

Who doesn’t love a rich, creamy, and downright delicious dessert? Peanut butter pie is one of my go to treats when I’m craving something indulgent yet easy to make. Whether you’re whipping it up for a special occasion or just satisfying a midweek sweet tooth, this pie will win hearts (and taste buds) every single time!
Method
Whip the Cream
To begin, take your heavy whipping cream and powdered sugar and combine them in a mixing bowl. Using a stand mixer or hand mixer, beat the mixture at medium-high speed. Continue whipping until the mixture transforms into a thick and fluffy consistency, resembling soft clouds. This process might take a few minutes, so be patient and make sure to stop once soft peaks form. Overmixing can cause the cream to become too stiff or grainy, which can affect the pie’s texture.
Prepare the Peanut Butter Mixture
Next, in a separate mixing bowl, combine the softened cream cheese, creamy peanut butter, and brown sugar. Make sure your cream cheese is at room temperature to avoid lumps. Using the mixer again, blend the ingredients at medium speed until the mixture is smooth and thoroughly combined. The end result should be a creamy, slightly thick mixture with no visible lumps of cream cheese.
Combine Mixtures
Now it’s time to bring the two mixtures together. Gently fold the whipped cream into the peanut butter mixture. Use a spatula for this process to maintain the fluffy texture. Folding rather than stirring helps keep the mixture light and airy. Make sure to incorporate the whipped cream evenly, blending until you achieve a homogenous, creamy texture without streaks.
Assemble the Pie
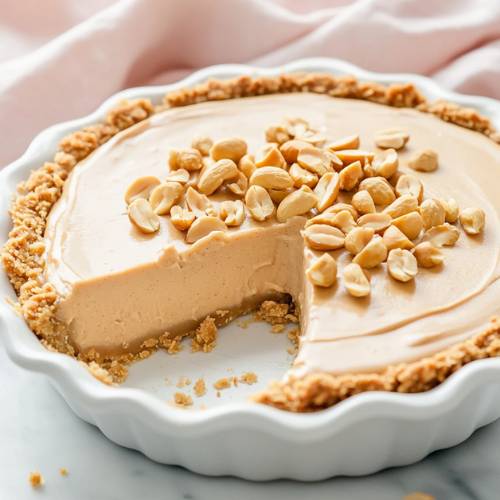
Take your gluten-free graham style crust and pour the creamy peanut butter filling into it. Use a spatula to spread the mixture evenly, making sure the surface is smooth and leveled. Take your time with this step to ensure an attractive presentation.
Add Toppings
Now for the finishing touch sprinkle chocolate shavings over the top of the pie. You can either grate a chocolate bar directly over the pie or use pre-made shavings for convenience. The rich, dark chocolate contrasts beautifully with the creamy filling and adds a touch of decadence.
Chill the Pie
Carefully cover the pie with plastic wrap or foil and place it in the refrigerator. It needs at least 4 hours to set, but if you can leave it overnight, even better! This chilling time allows the pie to firm up, making it easier to slice and enhancing the flavor.
Serve and Enjoy
Once the pie is well chilled, take it out of the fridge and slice it into generous servings. The texture should be creamy and firm, with a slightly crumbly crust. Serve as is or with an extra dollop of whipped cream on top for added indulgence.
Necessary Tools
- Stand or hand mixer
- Mixing bowls (at least two)
- Spatula
- Measuring cups
- Spoon or whisk

Peanut Butter Pie: A Sweet, Creamy Delight!
Cuisine: AmericanDifficulty: Easy8
servings15
minutes4
hours4
hours15
minutesIngredients
1 cup creamy peanut butter
8oz cream cheese (softened)
1 cup heavy whipping cream
1/2 cup powdered sugar
1/2 cup brown sugar
1 gluten-free graham style crust (I recommend @midelbrand!)
Chocolate shavings (for topping)
Directions
- Whip the Cream: Start by using your stand or hand mixer to beat together the heavy whipping cream and powdered sugar. Keep mixing until the texture becomes thick and fluffy like soft clouds!
- Prepare the Peanut Butter Mixture: In a separate bowl, blend the softened cream cheese, peanut butter, and brown sugar. Make sure it’s smooth and creamy with no lumps!
- Combine Mixtures: Gently fold the whipped cream mixture into the peanut butter blend. Mix well until it’s creamy and well incorporated.
- Assemble the Pie: Pour the creamy mixture into your prepared gluten-free graham cracker crust. Smooth the top with a spatula to make it look neat.
- Add Toppings: Sprinkle some chocolate shavings on top for a bit of flair and extra indulgence.
- Chill: Cover the pie and refrigerate for at least 4 hours. This step is crucial to allow the flavors to meld and the pie to firm up.
- Serve & Enjoy: Slice and savor the creamy, nutty goodness!
Notes
- Make sure the cream cheese is fully softened before mixing to avoid lumps.
- Be careful not to overmix the whipped cream it should hold soft peaks for the best texture.
- Chill the pie thoroughly before serving to maintain its shape.


Serving Suggestions
- Serve chilled straight from the fridge with a dollop of whipped cream.
- Top with extra chocolate shavings or drizzle with melted chocolate for a fancy touch.
- For a nutty crunch, add some chopped peanuts on top!
Fun Fact
Did you know that peanut butter was first invented in the late 1800s as a protein substitute for those who couldn’t chew meat? It’s been a favorite ever since!
Conclusion
This no bake peanut butter pie is a true crowd-pleaser. It’s creamy, rich, and oh-so-satisfying. Plus, with the easy gluten-free crust, everyone can enjoy a slice. Give it a try, and let me know how it turns out!