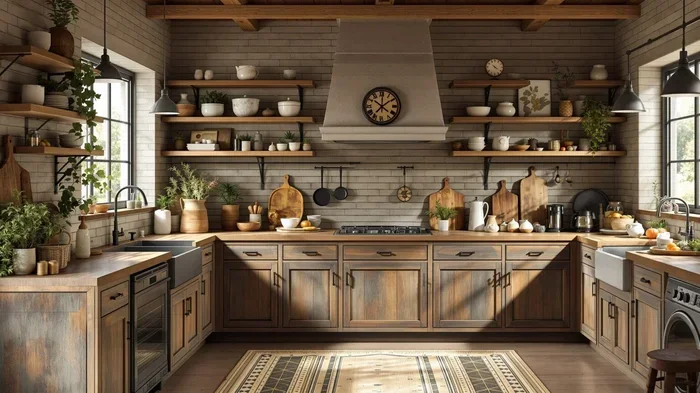


Greasy dust on top of kitchen cabinets is a common problem that every homeowner faces. This guide shows you how to clean greasy dust on top of kitchen cabinets fast using simple tools and safe methods. You will learn easy step-by-step techniques that save time and keep your kitchen looking great for months to come.
Grease and dust love to hide in places you do not think about. One of those sneaky spots is right on top of your kitchen cabinets. Over time, a thick layer of greasy dust builds up up there. It collects from cooking steam, oil sprays, and everyday kitchen activity. Many people forget about this area until it becomes really noticeable.
If you have ever walked into your kitchen and noticed a filmy layer above your cabinets, you are not alone. This is a very common issue in every kitchen. The good news is that how to clean greasy dust on top of kitchen cabinets is simpler than you might think. You do not need fancy tools or expensive products. With the right approach, you can make those cabinet tops look brand new in no time.
In this guide, we will walk you through everything you need to know. We will cover why grease builds up, what supplies you need, and the best cleaning methods. You will also learn how to stop this mess from coming back. Let us get started and make your kitchen sparkle again.
Key Takeaways
- Grease builds up fast: Cooking steam and oils naturally collect above cabinets over time.
- Simple tools work best: A microfiber cloth, warm water, and mild dish soap handle most jobs.
- Prevention is key: Regular dusting stops buildup before it becomes tough grime.
- DIY solutions save money: Vinegar and baking soda are cheap and effective grease fighters.
- Avoid common mistakes: Using too much water or harsh chemicals can damage cabinet finishes.
- Consistency matters: A quick monthly wipe keeps cabinet tops looking clean for good.
📑 Table of Contents
- Why Greasy Dust Builds Up on Kitchen Cabinets
- What You Need to Clean Greasy Dust on Top of Kitchen Cabinets
- How to Clean Greasy Dust on Top of Kitchen Cabinets: Step by Step
- Best Cleaning Solutions for Grease Buildup
- How to Prevent Greasy Dust from Returning
- Common Mistakes People Make When Cleaning Cabinet Tops
- Conclusion
Why Greasy Dust Builds Up on Kitchen Cabinets
Understanding why grease collects on your cabinet tops is the first step. Once you know the cause, you can tackle it better. Grease does not just appear out of nowhere. There is a real science behind it.
The Role of Cooking Oils and Steam
Every time you cook, tiny oil droplets go into the air. This happens with frying, sautéing, and even boiling. These microscopic oil particles float upward. They settle on every surface they touch. Your cabinet tops are right in the path of this airborne grease.
Steam from cooking also plays a big role. Hot steam carries oil molecules with it. As the steam cools, it leaves behind a sticky film. Over weeks and months, this film builds up. It turns into a thick, grimy layer that is hard to ignore.
Quick Tip: Turn on your range hood while cooking. This cuts down on the amount of grease that reaches your cabinet tops. It is one of the simplest ways to reduce buildup.
Why Cabinet Tops Are So Hard to Reach
The design of most kitchens makes cabinet tops a blind spot. They sit above your cabinets and behind your upper shelves. Most people do not think to clean them. And reaching them is not easy.
You need a sturdy step stool or ladder. Many people skip this step because it feels like too much effort. As a result, grease and dust just keep piling up. Over time, this layer can become thick and sticky. It may even attract more dust and dirt.
Expert Insight: Kitchen designers often leave extra space above cabinets on purpose. This gap allows heat to escape from the top of the stove. But it also means more grease has somewhere to land. Knowing this helps you plan your cleaning routine better.
What You Need to Clean Greasy Dust on Top of Kitchen Cabinets
You do not need a lot of supplies for this job. In fact, most of what you need is already in your home. Having the right tools makes the job much easier and faster.
Essential Cleaning Tools
Here is a simple list of what you will need:
- Microfiber cloths – These grab grease better than paper towels. They are also reusable and gentle on surfaces.
- A long-handled duster or mop – This helps you reach the cabinet tops without climbing up every time.
- A soft-bristle brush – Great for loosening stuck-on grime before you wipe it away.
- A spray bottle – For applying your cleaning solution evenly.
- A step stool or ladder – Safety first. Make sure it is stable before you start.
- Warm water – The base for most cleaning solutions.
- Mild dish soap – Cuts through grease effectively without being too harsh.
Having these tools ready before you start saves a lot of time. You will not need to stop halfway through to find something.
Natural vs. Store-Bought Cleaners
You have two main choices when it comes to cleaning solutions. You can go the natural route or use store-bought products. Both work well. Each has its own pros and cons.
Natural cleaners like vinegar and baking soda are safe and affordable. They do not contain harsh chemicals. Store-bought degreasers are often stronger and faster-acting. They are designed specifically to break down grease.
Here is a quick comparison of both options:
| Feature | Natural Cleaners | Store-Bought Degreasers |
|---|---|---|
| Cost | Very low | Moderate |
| Grease Fighting Power | Good for light buildup | Excellent for heavy buildup |
| Safety | Very safe | Use with good ventilation |
| Availability | Already in most homes | Need to purchase |
| Environmental Impact | Low | Varies by product |
| Time to Work | May need longer soak | Fast-acting formulas |
Quick Tip: For light grease, start with natural cleaners. They work well for regular maintenance. Save store-bought degreasers for tough, stubborn buildup that natural methods cannot handle.
How to Clean Greasy Dust on Top of Kitchen Cabinets: Step by Step
Now that you have your supplies ready, let us get to work. Follow these steps for the best results. This method works for almost any type of cabinet finish. Whether your cabinets are wood, laminate, or painted, these steps apply.
Step 1: Remove Loose Dust First
Before you apply any liquid, start by removing loose dust. Use a long-handled duster or a dry microfiber cloth. Reach up and gently sweep the surface. This removes the loose particles that could turn into mud when you add water.
Do not skip this step. If you go straight to wet cleaning, the dust will mix with moisture. This creates a paste that is harder to remove. Taking a few extra minutes for dry dusting saves you work later.
Key Takeaway: Always dust first. It makes the wet cleaning step much more effective and gives you better results.
Step 2: Apply Your Cleaning Solution
Now it is time to apply your cleaner. If you are using a DIY solution, mix it in your spray bottle first. Spray the solution onto the cabinet top. Do not soak it. A light, even mist works best.
Let the solution sit for about five minutes. This gives it time to break down the grease. The grime will start to loosen during this time. You will see it getting softer and easier to wipe away.
Quick Tip: For heavy grease buildup, let the solution sit for ten minutes. You can also reapply a second layer. This extra time makes a big difference in how easily the grime comes off.
Step 3: Scrub Gently but Thoroughly
After the solution has had time to work, it is time to scrub. Use a soft microfiber cloth or a soft-bristle brush. Move in gentle circular motions. Do not press too hard. You want to lift the grease, not scratch the surface.
For tough spots, apply a little more pressure. You can also use a cotton swab for tight corners and edges. Work in small sections. This keeps the cleaning solution from drying out before you can wipe it away.
Expert Insight: If you are dealing with sticky residue, try warming the cloth slightly with hot water. Warmth helps dissolve hardened grease faster. Just make sure the cloth is not dripping wet when you apply it.
Step 4: Wipe and Dry
Once you have scrubbed the entire surface, it is time to wipe clean. Use a fresh, damp microfiber cloth to remove any remaining cleaner and grime. Rinse the cloth often. You do not want to spread dirty water across a clean surface.
After wiping, dry the surface with a clean, dry cloth. This prevents water spots and streaks. It also helps the surface dry evenly. A clean finish looks much better than a streaky one.
Key Takeaway: Always dry the surface after cleaning. This protects the cabinet finish and prevents water damage over time.
Best Cleaning Solutions for Grease Buildup
Not all cleaning solutions work the same way. Some are great for light dust. Others handle heavy grease with ease. Let us look at the best options for grease removal on cabinet tops.
DIY Cleaning Recipes
You can make effective cleaners right in your kitchen. Here are a few tried-and-true recipes that work wonders:
- Vinegar and Water Solution: Mix equal parts white vinegar and warm water in a spray bottle. This cuts through light grease easily. It is safe for most cabinet finishes and leaves no harsh residue behind.
- Baking Soda Paste: Mix three tablespoons of baking soda with one tablespoon of water. Apply it to tough grime spots. Let it sit for ten minutes, then scrub gently. This is great for sticky residue that will not budge.
- Dish Soap and Warm Water: Add a few drops of mild dish soap to a bowl of warm water. Dip your cloth in the solution and wring it out. This is a simple but effective option for regular cleaning of cabinet tops.
- Lemon and Baking Soda: Cut a lemon in half and dip it in baking soda. Use it to scrub greasy spots. The lemon adds a fresh scent and extra cleaning power that cuts through grime naturally.
These recipes use items you likely already have at home. They are safe, affordable, and work well for most kitchen cabinet cleaning tasks. They are also gentle on the environment.
Store-Bought Options
When DIY solutions are not enough, store-bought products step up. Here are some popular choices for tough grease:
- Degreaser sprays – These are designed to break down tough grease fast. Look for ones labeled safe for kitchen surfaces and cabinet finishes.
- All-purpose kitchen cleaners – Good for everyday maintenance and light grease removal.
- Grease-fighting wipes – Convenient for quick touch-ups between deep cleans. They are not as powerful as sprays but work well for surface dust.
- Heavy-duty oven cleaners – Only use these as a last resort. They are very strong and can damage cabinet finishes if not used carefully.
Always check the label before using any product on your cabinets. Some chemicals can damage wood finishes or paint. Test on a small, hidden area first. Wait a few minutes and check for any damage before you proceed with the full surface.
Quick Tip: Keep a small spray bottle of your favorite cleaner in the kitchen. This makes it easy to do quick touch-ups whenever you notice grease building up on the cabinet tops.
How to Prevent Greasy Dust from Returning
Cleaning is only half the battle. The real goal is to stop greasy dust from coming back. Prevention is much easier than deep cleaning. A few simple habits can make a huge difference in how often you need to climb up there.
Simple Habits That Help
Small changes in your daily routine can cut down on grease buildup a lot:
- Use your range hood every time you cook. This is the single best way to trap grease before it reaches your cabinets. Make it a habit to turn it on before you start cooking.
- Turn on the exhaust fan. Even if you do not have a range hood, the fan helps pull steam and grease away from your cabinets. Run it for a few minutes after cooking too.
- Cover pots when cooking. This reduces the amount of steam and oil droplets that go into the air. Lids are your best friend when it comes to reducing kitchen grease.
- Cook on lower heat when possible. High heat creates more oil splatter and steam. Lower heat means less grease floating around your kitchen.
- Wipe down cabinet fronts regularly. When you clean the fronts, you also reduce the amount of grease that drifts to the tops. A quick wipe during your regular kitchen cleaning routine goes a long way.
Key Takeaway: Small daily habits add up over time. They keep your cabinet tops cleaner for longer and reduce how often you need to do a deep clean.
Regular Maintenance Tips
Building a simple maintenance routine makes a big difference. Here is what works well for most households:
- Dust cabinet tops monthly. Use a long-handled duster to remove loose dust before it mixes with grease. This only takes a few minutes but prevents buildup.
- Do a light wipe-down every three months. Use a damp microfiber cloth with a little dish soap. This removes early grease before it hardens and becomes difficult to remove.
- Deep clean every six months. Go through the full step-by-step process we outlined above. This handles any buildup that has occurred over time and keeps your cabinets looking their best.
- Check behind appliances too. Grease can collect behind toasters, microwaves, and other small appliances. Include these areas in your cleaning routine for a thorough job.
Expert Insight: Many professional cleaners recommend the “one-up, one-down” rule. When you clean your lower cabinets, take a moment to wipe the tops too. This keeps everything in sync and prevents neglect of the upper areas.
Common Mistakes People Make When Cleaning Cabinet Tops
Even with the best intentions, mistakes happen. Knowing what to avoid saves you time and protects your cabinets. Here are the most common errors people make when tackling greasy dust on top of kitchen cabinets.
Using Too Much Water
This is the number one mistake people make. Soaking your cabinets with water can cause serious damage. Water can seep into the wood or MDF material. Over time, this leads to swelling, warping, or even mold growth. Nobody wants that.
Always wring out your cloth well. It should be damp, not dripping wet. If you are using a spray bottle, apply light misting only. Less is more when it comes to water and wood cabinets. A little moisture goes a long way.
Common Mistake: Using a dripping wet mop or sponge directly on cabinet tops. This introduces way too much moisture and can ruin the finish over time.
Skipping the Prep Work
Jumping straight into cleaning without removing loose dust is a waste of effort. The dust turns into mud when it meets your cleaning solution. This creates streaks and smears that are harder to remove than the original grease.
Always start with a dry dusting. Then apply your cleaner. This two-step approach gives you much better results. It also means you do not have to scrub as hard. Your arms will thank you.
Using Harsh Chemicals on Delicate Finishes
Not all cabinet finishes can handle strong cleaners. Lacquered, painted, or stained cabinets need gentle care. Harsh chemicals can strip the finish, cause discoloration, or leave a dull appearance that is hard to fix.
Stick to mild dish soap or natural cleaners for most finishes. If you are unsure about a product, test it on a hidden spot first. Wait a few minutes and check for any damage before you proceed with the full surface.
Quick Tip: When in doubt, use the mildest cleaner that gets the job done. You can always go stronger if needed. But you cannot undo damage from a harsh chemical that was too strong for the finish.
Neglecting the Backsplash and Walls
Greasy dust does not just land on cabinet tops. It also collects on the backsplash and upper walls. If you only clean the cabinets, you are missing a big part of the problem. Grease travels and settles on nearby surfaces too.
Take a few extra minutes to wipe down the backsplash area as well. This creates a more thorough cleaning job. It also helps keep the entire kitchen area cleaner for longer. A holistic approach gives you the best results.
Key Takeaway: Think bigger than just the cabinet tops. A thorough approach gives you better results and a cleaner kitchen overall. Your kitchen will feel fresher when you address all the surfaces where grease collects.
Conclusion
Cleaning greasy dust on top of kitchen cabinets does not have to be a dreaded chore. With the right tools, the right solutions, and a simple routine, you can keep your cabinets looking great. The key is to stay consistent and not let the grease build up too much before you tackle it.
Start with the basics. Dust first, then clean. Use gentle but effective solutions. And most importantly, take steps to prevent buildup in the first place. A little effort goes a long way when it comes to kitchen cabinet maintenance. Small habits make a big difference over time.
Now that you know how to clean greasy dust on top of kitchen cabinets the right way, you have no excuse to let that grime sit any longer. Grab your supplies, climb up there, and give your kitchen the fresh start it deserves. Your kitchen will look and feel better the moment you are done. Make it a habit, and your cabinets will thank you for it.
Frequently Asked Questions
How often should I clean the tops of my kitchen cabinets?
For most kitchens, a light dusting once a month and a deeper clean every three to six months works well. If you cook often or have a lot of steam in your kitchen, you may need to clean more frequently. Regular maintenance prevents heavy buildup and makes each cleaning session much faster and easier.
What is the best homemade cleaner for greasy cabinets?
A simple mix of equal parts white vinegar and warm water in a spray bottle is one of the best homemade cleaners. For tougher grime, a baking soda paste works great. Both are safe, affordable, and effective for most cabinet finishes without causing damage or leaving harsh chemical residues behind.
Can I use a steam cleaner on cabinet tops?
It is best to avoid steam cleaners on wooden or painted cabinets. The high heat and moisture can damage the finish, cause warping, or loosen glue joints. Stick to damp microfiber cloths and mild cleaning solutions for safe and effective grease removal without the risk of water damage.
How do I remove sticky residue from wooden cabinets?
Apply a baking soda paste to the sticky spot and let it sit for ten minutes. Gently scrub with a soft cloth. For stubborn residue, a small amount of rubbing alcohol on a cloth can help dissolve the stickiness. Always test on a hidden area first to make sure the alcohol does not damage the wood finish.
Is it safe to climb on top of kitchen cabinets?
Only if you use a sturdy, stable step stool or ladder designed for the height. Never stand on the cabinets themselves, as they are not built to hold your weight. Always place your ladder on a flat, solid surface. If you feel unsafe at any point, consider hiring a professional cleaner for this task.
What causes so much grease above kitchen cabinets?
Cooking is the main culprit. Every time you fry, sauté, or boil food, tiny oil droplets and steam rise into the air. Without a range hood or exhaust fan, these particles settle on every surface above your stove. Cabinet tops are the first horizontal surface they hit, which is why they collect so much greasy dust over time.