
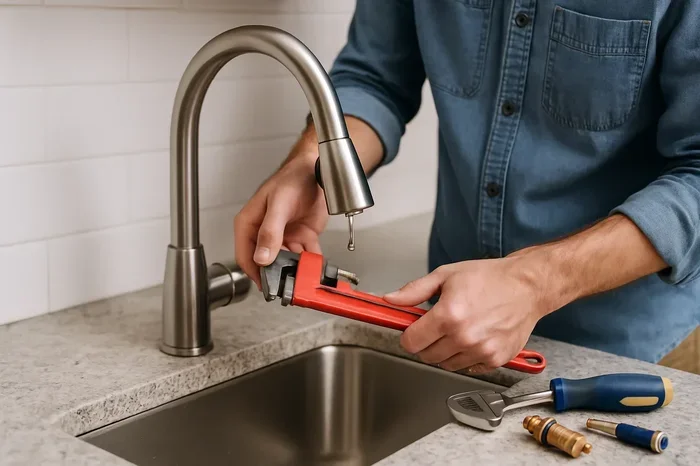

This guide shows you exactly how to remove a kitchen faucet cartridge safely and quickly. You will find a full list of tools, step-by-step instructions, brand-specific tips, and common mistakes to avoid. Whether you have a Moen, Delta, or another brand, this guide covers it all.
A kitchen faucet is something you use every single day. You turn it on to wash dishes, fill pots, and rinse fruits. Over time, parts inside the faucet start to wear down. One of the most common issues is a failing cartridge. The cartridge is the internal mechanism that controls water flow and temperature. When it breaks down, you may notice leaks, drips, or difficulty switching between hot and cold water.
Many homeowners worry about tackling this repair themselves. The truth is that removing a kitchen faucet cartridge is easier than most people think. You do not need to be a professional plumber. With the right tools and a little patience, you can complete this task in under an hour. This guide gives you clear instructions for every step of the process.
We will cover everything from identifying your cartridge type to pulling it out safely. You will also find tips specific to popular brands like Moen and Delta. Whether you have a single handle faucet or a two handle faucet, this guide has you covered. Let us get started.
Key Takeaways
- Shut off the water supply first: This prevents flooding and keeps you safe during the entire process.
- Use the right tools: A basic set of household tools makes faucet handle removal and cartridge extraction easy.
- Know your cartridge type: Different brands like Moen and Delta use different cartridge designs, so identification matters.
- Inspect O-rings and seals: These small parts often cause leaks and should be checked during every removal.
- Avoid forcing parts: Gentle pressure and patience prevent damage to your faucet and sink.
- Replace worn cartridges: A damaged cartridge will not fix itself, and replacing it solves most leak and drip issues.
📑 Table of Contents
- What Is a Kitchen Faucet Cartridge?
- Tools and Supplies You Will Need
- How to Remove a Kitchen Faucet Cartridge Step by Step
- Common Cartridge Types and How They Differ
- Common Mistakes to Avoid During Faucet Cartridge Removal
- When to Replace Your Cartridge Instead of Reusing It
- Tips for a Smooth Faucet Repair Experience
- Conclusion
What Is a Kitchen Faucet Cartridge?
A faucet cartridge is a small cylindrical component inside your faucet. It regulates how much water comes out and whether it is hot or cold. When you turn the handle, the cartridge moves inside the faucet body to open or close water passages. Think of it like a valve that directs water flow with precision.
Cartridge faucets are very common in modern kitchens. They differ from ball faucets and disc faucets in how they control water. The cartridge design is simple, reliable, and easy to maintain. Most cartridge faucets use a rotating handle or a lever that moves up and down. Inside, the cartridge has seals, springs, and sometimes O-rings that keep water from leaking.
How Does a Cartridge Faucet Work?
When you turn the handle, the cartridge slides up or down or rotates inside the faucet body. This action opens or closes water ports. Hot and cold water inlets sit on either side of the cartridge. By positioning the cartridge correctly, you get the perfect mix of temperature and pressure. Over time, the seals and O-rings inside the cartridge can degrade. This leads to leaks, dripping, or inconsistent water flow.
Understanding how your cartridge works makes the removal process much easier. You will know what to look for and what parts may need replacing along with the cartridge itself. This knowledge also helps you choose the right replacement cartridge when the time comes.
Tools and Supplies You Will Need
Before you start, gather everything you need. Having the right tools ready saves time and prevents frustration. You do not need anything fancy, but a few specific items make the job much smoother.
- Adjustable wrench or basin wrench
- Flat-head screwdriver
- Phillips-head screwdriver
- Needle-nose pliers
- Cartridge removal tool (brand-specific)
- Plumber’s grease
- Soft cloth or towel
- Bucket or bowl
- Replacement O-rings and seals
- Flashlight
A faucet cartridge tool is especially helpful. Many brands sell their own version of this tool. It fits snugly into the cartridge and allows you to pull it out without damaging the faucet body. If you do not have one yet, consider picking one up before you start. It is a small investment that pays off quickly.
Also, keep a soft cloth nearby. Placing it in the sink protects the faucet and sink surface from scratches while you work. A bucket underneath catches any residual water that may spill out during the process.
How to Remove a Kitchen Faucet Cartridge Step by Step
Now let us get into the actual process. Follow these steps carefully and you will have your cartridge out in no time. Each step builds on the previous one, so do not skip ahead.
Step 1: Shut Off the Water Supply
This is the most important step. Before you do anything, locate the shut-off valves under your sink. Turn both the hot and cold valves clockwise to close them. If your sink does not have individual shut-off valves, turn off the main water supply to your home.
Once the water is off, turn on the faucet to release any remaining pressure. Let the water drain completely into the bucket or sink. This prevents unexpected water bursts when you start disassembling the faucet. Taking this extra minute saves you from a potential flood.
Step 2: Remove the Faucet Handle
Most faucet handles have a decorative cap on top. Use a flat-head screwdriver or a butter knife to gently pry it off. Underneath, you will find a screw. Remove this screw carefully and set it aside in a safe place.
Once the screw is out, pull the handle straight up and off. If it feels stuck, try wiggling it gently from side to side. Do not use excessive force. A little patience goes a long way. Some handles may have a retaining clip underneath. Use needle-nose pliers to remove this clip if present.
For a single handle faucet, the handle usually pulls straight off after the screw is removed. For a two handle faucet, you will need to repeat this process for both handles. Take note of which handle controls hot and which controls cold. This makes reassembly much easier later.
Step 3: Take Off the Retaining Clip or Cap
With the handle removed, you will see the cartridge housing. At the base of the housing, there is usually a retaining clip. This clip holds the cartridge securely in place. Use needle-nose pliers or a flat-head screwdriver to gently pry it out.
Some faucets use a decorative cap instead of a clip. If yours has one, carefully pry it off with a flat tool. Underneath, you may find a packing nut. Use an adjustable wrench to loosen this nut by turning it counterclockwise. Go slowly and do not apply too much pressure. You do not want to damage the faucet body.
If you are working with a Moen cartridge, look for a clip on the side or bottom of the cartridge housing. Delta faucets often use a different system. Identifying your brand early helps you know exactly what to expect at this stage.
Step 4: Pull Out the Cartridge
This is the moment you have been working toward. With the handle and retaining clip removed, the cartridge should be visible. Grip it firmly with your hand or use pliers wrapped in a soft cloth for a better hold.
Pull the cartridge straight up and out. It may require some gentle wiggling. If it feels stuck, do not force it. Try spraying a small amount of penetrating oil around the base and wait a few minutes. This can loosen any mineral buildup or corrosion that is holding it in place.
For some cartridge designs, you may need to use a dedicated cartridge removal tool. These tools grip the top of the cartridge and allow you to pull it out with even leverage. They are especially useful for cartridges that sit deep inside the faucet body.
As you pull the cartridge out, have your bucket ready. There may be a small amount of water left inside. Place the old cartridge on a clean surface so you can examine it closely in the next step.
Step 5: Inspect the Cartridge and Surrounding Parts
Now that the cartridge is out, take a good look at it. Check for visible damage, cracks, or wear on the seals. Compare it to a new cartridge if you have one. This inspection tells you whether you need a full replacement or if the issue is something simpler.
While the cartridge is out, this is a great time to inspect the surrounding area. Look at the O-rings, seals, and the inside of the cartridge housing. Mineral deposits and hard water buildup are common culprits behind faucet problems. Clean these areas thoroughly with a mild vinegar solution.
Use a flashlight to get a clear view inside the housing. If you see any debris or buildup, gently remove it with a soft brush or cloth. This ensures that when you reinstall or replace the cartridge, everything sits properly and seals tightly.
Common Cartridge Types and How They Differ
Not all cartridges are the same. Different brands and models use unique designs. Knowing which type you have helps you choose the right replacement and use the correct removal technique.
Moen Cartridges
Moen is one of the most popular faucet brands in homes today. Moen cartridges come in several styles, including the 1222, 1224, and 1255 models. These cartridges typically have a plastic or metal body with rubber seals. To remove a Moen cartridge, you usually need to pull out the retaining clip first, then pull the cartridge straight up. Moen also makes a specific removal tool called the Moen 105415 cartridge removal tool, which fits several of their models.
One thing to keep in mind with Moen faucets is that some models have a plastic sleeve inside the faucet body. This sleeve protects the cartridge and should be inspected during removal. If the sleeve is damaged, it should be replaced along with the cartridge.
Delta Cartridges
Delta faucets use their own proprietary cartridge designs. The most common is the Delta single-handle cartridge, which comes in different series like the RP19803 and RP47806. Delta cartridges often have a distinctive shape with a splined end that connects to the handle. Removing a Delta cartridge typically involves removing the handle, then using a cartridge removal tool or pliers to pull it straight out.
Delta also makes ceramic disc cartridges for their disc faucet models. These are different from traditional cartridges and require a slightly different removal approach. Always check your Delta model number before purchasing a replacement to ensure a proper fit.
Other Brands and Generic Cartridges
Brands like Kohler, Pfister, and Peerless each have their own cartridge designs. Kohler cartridges often have a round body with a flat top. Pfister cartridges tend to be shorter and wider. Generic cartridges are also available for older or discontinued faucet models. These may require adapters or modifications during installation. Always check compatibility before purchasing a generic replacement.
Common Mistakes to Avoid During Faucet Cartridge Removal
Even with clear instructions, mistakes can happen. Knowing what to avoid saves you time, money, and potential damage to your faucet.
- Forcing the handle off: If the handle does not come off easily, do not use a hammer or excessive force. Check for hidden screws or clips first.
- Skipping the water shutoff: Working with water still on creates a mess and can cause water damage inside your cabinets.
- Using the wrong tools: Channel-lock pliers without a cloth can scratch chrome finishes. Always wrap tools in a soft cloth before gripping any faucet part.
- Losing small parts: Screws, clips, and O-rings are easy to misplace. Use a magnetic tray or a small bowl to keep track of everything.
- Ignoring mineral buildup: If you remove the cartridge and do not clean the housing, the new cartridge may leak due to debris blocking the seal.
- Mixing up hot and cold: In two-handle faucets, mixing up the hot and cold cartridges causes temperature confusion. Label parts as you go.
Another common mistake is not turning the water back on slowly. After you reinstall the cartridge, open the shut-off valves gradually. This prevents a water hammer effect that can damage the new cartridge or loosen connections.
When to Replace Your Cartridge Instead of Reusing It
Not every cartridge needs to be replaced. If your cartridge looks clean and shows no visible damage, you can reinstall it after a thorough cleaning. However, there are clear signs that replacement is the better option.
If you notice constant dripping even after cleaning the cartridge, the internal seals are likely worn out. Cracks or chips in the cartridge body also mean it is time for a new one. Additionally, if your faucet has been in use for over five years, a replacement cartridge is a smart preventive measure. New cartridges restore full water pressure and eliminate leaks that develop from normal wear and tear.
When purchasing a replacement cartridge, bring the old one to the hardware store. This ensures an exact match. You can also look up your faucet model number online or on the manufacturer’s website. Most brands offer cartridge lookup tools on their support pages.
Tips for a Smooth Faucet Repair Experience
A few extra tips can make your cartridge removal and replacement much easier. Here are some practical insights from experienced plumbers and homeowners.
- Take photos during disassembly: Photos help you remember exactly how each part fits together during reassembly.
- Apply plumber’s grease to O-rings: This lubrication prevents sticking and extends the life of your new cartridge.
- Work in good lighting: A headlamp or under-cabinet light helps you see small parts and clips clearly.
- Keep a towel under the sink: This catches any drips and protects the cabinet below from water damage.
- Test the faucet after reassembly: Turn on both hot and cold water and check for leaks around the base and handle. Tighten connections if needed.
- Replace O-rings at the same time: Even if they look okay, replacing them prevents future leaks and ensures a tight seal.
Regular faucet maintenance goes a long way in preventing future problems. Clean your faucet aerator every few months to prevent mineral buildup. Check O-rings annually and replace them at the first sign of wear. These simple habits keep your faucet running smoothly for years.
If you are dealing with a pull out faucet cartridge or a pull down faucet cartridge, the removal process is similar but may require extra care. These faucet types have a hose assembly that can get in the way. Remove the spray head and hose first before tackling the cartridge itself. This gives you better access and prevents accidental damage to the hose.
Conclusion
Removing a kitchen faucet cartridge does not have to be intimidating. With the right tools, a little patience, and clear instructions, anyone can handle this common home repair. We covered the entire process from shutting off the water supply to inspecting the old cartridge and avoiding common mistakes.
Remember that faucet cartridge removal is really about taking your time and working carefully. Whether you have a Moen, Delta, or another brand, the steps are fundamentally the same. Identify your cartridge type, gather your tools, and follow each step in order.
Regular maintenance and timely cartridge replacement keep your kitchen faucet working like new. A well-functioning faucet makes daily tasks easier and prevents water waste. Now that you know how to remove a kitchen faucet cartridge, you have the confidence to tackle this repair and keep your kitchen running smoothly for years to come.
Frequently Asked Questions
Do I need special tools to remove a kitchen faucet cartridge?
You do not need anything exotic. A basic set of tools including an adjustable wrench, flat-head and Phillips screwdrivers, and needle-nose pliers will handle most cartridge removals. A brand-specific cartridge removal tool is helpful but not required for every model.
How do I know which cartridge type I have?
Check the brand name on your faucet and look up the model number, usually found on the base or under the handle. You can also remove the old cartridge and bring it to a hardware store for an exact match. Most manufacturers also offer online lookup tools for their cartridges.
Can I remove a faucet cartridge without turning off the water?
You should always turn off the water supply before starting. Working with water still on creates a mess and can cause water damage. Shut-off valves are usually located under the sink, and turning them off takes only a few seconds.
Why does my faucet leak even after I remove the cartridge?
A leak after removal usually means the O-rings, seals, or valve seat are damaged. Clean the housing thoroughly and inspect all surrounding parts. Replacing O-rings and seals along with the cartridge often solves persistent leak problems.
How often should I replace my kitchen faucet cartridge?
Most cartridges last between five and ten years with normal use. If you notice dripping, difficulty switching between hot and cold, or reduced water pressure, it is time to inspect or replace the cartridge. Regular maintenance can extend its lifespan.
Is it better to replace a cartridge or buy a new faucet?
Replacing a cartridge is much more affordable than buying a new faucet. A new cartridge costs between fifteen and fifty dollars, while a new faucet can run one hundred dollars or more. Unless the faucet body itself is damaged, cartridge replacement is the smarter choice for most leaks and drips.