


Who doesn’t love OREOs and ice cream? Now, imagine putting them together! That’s what I did with these homemade OREO Ice-Cream Sandwiches. They’re cool, chocolaty, and super fun to make. And guess what? You only need a few simple ingredients and a little bit of freezer patience. Ready to chill out with a sweet treat? Let’s dive in!
Method
Mix the Dough
To start, grab a large mixing bowl and combine the almond flour and jet black cocoa powder. Stir them together until the mixture looks evenly dark and smooth. Next, pour in the maple syrup and continue mixing until everything comes together into a thick, soft dough. The texture should be pliable and not too sticky kind of like cookie dough. Once it’s well mixed, divide the dough into two equal parts. One half will be used for the bottom of your sandwich, and the other half will go on top.
Press the Base
Take an 8×8-inch square dish and line it with parchment paper, making sure there’s enough paper hanging over the sides for easy lifting later. Place one half of your dough into the dish and press it down firmly with your fingers or a spatula. Try to make the layer as even and smooth as possible it will be the bottom of your sandwich, so it helps if it’s flat and level.
Add the Ice Cream
Before adding the ice cream, make sure it’s soft but not melted. If it’s too firm, blend it for a few seconds or leave it out on the counter for 5–10 minutes until it’s easy to spread. Using a spatula or the back of a spoon, gently spread the softened vanilla ice cream over the pressed dough layer. Take your time to spread it out smoothly and evenly, right up to the edges of the dish. The ice cream layer should be about the same thickness as the dough.
Add the Top Layer
Now you have two choices for placing the top dough layer. Option 1 is to place the dish in the freezer for about 30–45 minutes to firm up the ice cream. Once it’s set, gently press the second half of the dough directly over the ice cream, smoothing it out carefully. Option 2 is a little trickier but saves time: roll the second half of the dough between two sheets of parchment paper until it’s about the size of the dish. Then, carefully lift the parchment paper and flip the rolled dough on top of the soft ice cream layer. Press down very gently to make sure it sticks, but be careful not to smush the ice cream layer underneath.
Freeze It All
Once both layers are assembled, cover the dish and place it in the freezer for at least 5 hours, or until the entire dessert is completely firm. This part takes some patience, but it’s totally worth it. Don’t try to cut the sandwiches too early, or they’ll be too soft to hold their shape.
Slice and Enjoy
After the freezing time is up, lift the entire block out of the dish using the parchment paper handles. Place it on a cutting board and use a sharp knife to cut the dessert into 9 equal squares. The result? Perfectly layered OREO style ice-cream sandwiches that are cold, creamy, and ready to impress. Enjoy them immediately or keep them stored in the freezer for a cool treat anytime!
Necessary Tools
- 8×8-inch square dish
- Parchment paper
- Mixing bowl
- Spoon or spatula
- Blender (optional, to soften ice cream)
- Freezer
- Knife (for slicing once frozen)
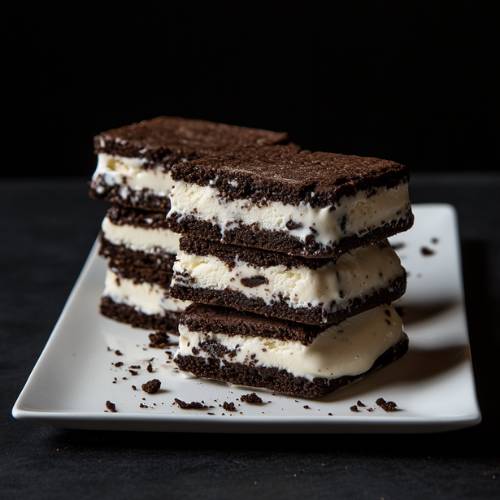
OREO Ice-Cream Sandwiches
Cuisine: AmericanDifficulty: Easy9
servings15
minutes5
hours5
hours15
minutesIngredients
3 cups almond flour
1/3 cup jet black cocoa powder
1/2 cup + 2 tablespoons maple syrup
1 quart vanilla ice-cream (softened just a little!)
Directions
- Mix the Dough: In a bowl, stir together the almond flour and jet black cocoa. Add the maple syrup and mix until a soft dough forms. Divide the dough into two equal parts.
- Press the Base: Line your 8×8 dish with parchment paper. Take one half of the dough and press it down into the bottom of the dish to form a nice even layer.
- Add the Ice Cream: If your vanilla ice cream is a little too hard, pop it in the blender for a few seconds to make it easier to spread. Gently spread it over the first dough layer.
- Add the Top Layer: Now, you have two choices: Option 1: Freeze the ice cream layer for a bit until it firms up, then press the second dough layer on top. Option 2: Roll the second dough half between parchment paper and carefully lay it over the soft ice cream layer.
- Freeze It All: Cover and freeze the whole thing for at least 5 hours or until completely set.
- Slice and Enjoy: Once frozen, lift out your ice-cream sandwich block and slice it into 9 squares. YUM!
Notes
- Don’t skip the parchment paper it makes lifting and slicing super easy.
- If your dough is sticky, chill it for a few minutes before pressing.
- Make sure your ice cream is soft enough to spread but not melted into soup!
- Be gentle when laying the top dough so it doesn’t squish the ice cream layer too much.


Serving Suggestions
- Eat them right out of the freezer on a hot day!
- Dip the sides in melted chocolate and freeze again for extra crunch.
- Sprinkle crushed OREOs around the edges before freezing.
- Add colorful sprinkles on the ice cream layer before adding the top!
Fun Fact
Did you know that the original OREO cookie was first sold in 1912? That’s over 100 years ago! And now, we’ve given it an ice-cream twist pretty cool, right?
Conclusion
These OREO Ice-Cream Sandwiches are the perfect homemade treat for summer (or anytime, honestly). They’re rich, creamy, and just the right amount of sweet. Plus, making them is a fun kitchen activity that even kids can help with! So grab your ingredients and freezer space deliciousness is on the way!