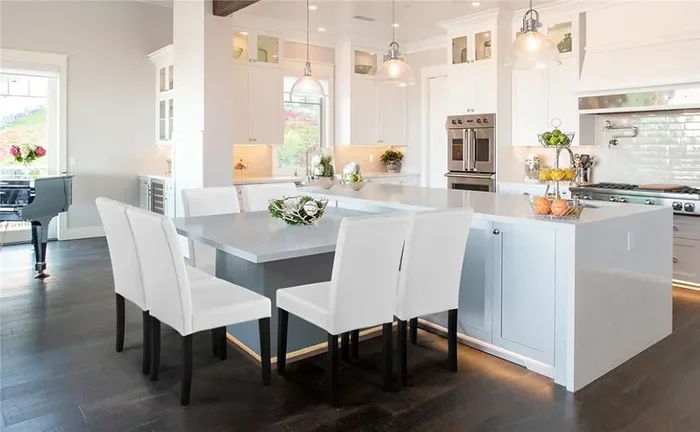
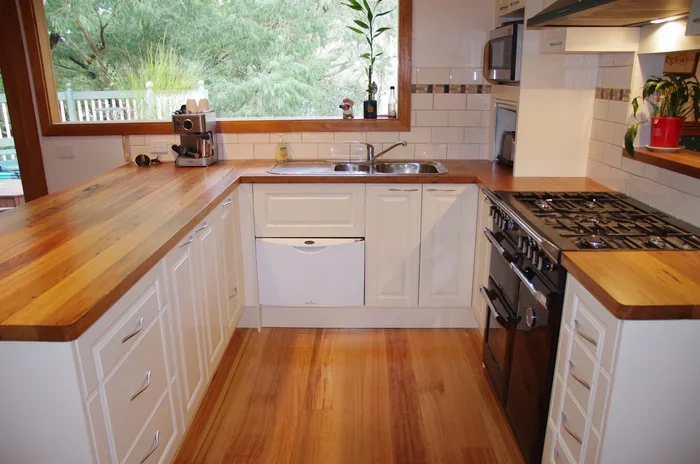

Building a kitchen bench is easier than you think. With our simple step by step plans, you can create a sturdy and stylish bench for your kitchen in just one weekend. This guide covers everything from choosing materials to finishing touches.
Key Takeaways
- Simple Plans: Follow easy step by step instructions that anyone can understand, even with basic woodworking skills.
- Affordable Materials: Use common lumber and hardware to keep costs low while building a strong kitchen bench.
- Customizable Design: Adjust the size, shape, and style to fit your kitchen space and personal taste.
- Essential Tools: You only need a few basic tools like a saw, drill, and sander to complete the project.
- Quick Build Time: Most kitchen benches can be built in a single weekend with careful planning.
- Long-Lasting Results: Proper finishing and sealing will protect your bench for years of daily use.
📑 Table of Contents
Why You Should Build a Kitchen Bench
A kitchen bench does more than just add seating. It gives you extra counter space. It creates a cozy spot for family meals. And it boosts the value of your home.
Many people think building furniture is hard. But a kitchen bench is one of the simplest projects you can tackle. You do not need fancy tools. You do not need years of experience. You just need a plan and some patience.
When you build a kitchen bench yourself, you control every detail. You pick the wood. You choose the height. You decide the length. The result is a piece of furniture that fits your space perfectly.
Plus, there is real joy in sitting at something you built with your own hands. Whether you use it for breakfast, homework, or late-night snacks, your DIY kitchen bench will become a favorite spot in your home.
Planning Your Kitchen Bench Design
Measure Your Kitchen Space
Before you buy any wood, grab a tape measure. Look at the area where you want the bench. Is it against a wall? Is it part of a kitchen island? Kitchen bench dimensions depend entirely on the space you have.
A standard bench height is about 18 to 20 inches. This matches most kitchen countertops. A typical bench length ranges from 4 to 6 feet. But your needs may be different. Measure carefully and write down your numbers.
Choose a Style That Fits Your Kitchen
Kitchen benches come in many styles. Some are simple and rustic. Others are sleek and modern. Think about your kitchen decor before you start.
Do you have a farmhouse kitchen? A clean wooden bench with a natural finish works great. Have a modern kitchen? Try a bench with smooth lines and a painted surface. Your kitchen bench design should match the feel of your home.
Decide on Storage Options
Some kitchen benches include built-in storage. You can add shelves underneath or even drawers. This is a smart choice if you have a small kitchen. Extra storage makes your space feel bigger and cleaner.
Think about what you want to store. Cookbooks? Baking sheets? Extra towels? Design your kitchen bench with storage around those needs.
Materials and Tools You Will Need
Best Wood Choices for a Kitchen Bench
The wood you choose affects both the look and the durability of your bench. Here are the most popular options:
- Pine: Affordable and easy to work with. Great for beginners. It is soft wood, so it may dent over time.
- Oak: Very strong and durable. It has a beautiful grain pattern. A bit more expensive but worth it.
- Maple: Hard and smooth. It resists scratches well. Perfect for a bench that gets daily use.
- Cedar: Naturally resistant to moisture. It smells great and looks warm.
For a first project, pine or poplar are excellent choices. They are affordable and forgiving. You can always upgrade to hardwood later.
Hardware and Supplies
Beyond wood, you will need a few basic supplies:
- Wood screws (2-inch and 3-inch)
- Wood glue
- Sandpaper (120 and 220 grit)
- Wood stain or paint
- Polyurethane or sealant
- Wood filler for filling gaps
Essential Tools
You do not need a full workshop. These tools will get the job done:
- A circular saw or hand saw
- A power drill with drill bits
- A measuring tape
- A square for straight cuts
- A sander (orbital or hand)
- A paintbrush or foam roller
- Clamps to hold pieces together
Step by Step Building Process
Step 1: Cut Your Wood Pieces
Start by cutting all your wood to size. Measure twice and cut once. This old saying saves a lot of headaches.
You will need the following pieces for a standard bench:
- Two side legs (cut to your desired bench height)
- A top seat board (cut to your desired length)
- Two stretchers (horizontal pieces that connect the legs)
- Optional: additional support boards for extra strength
Use your square to mark straight lines before cutting. Take your time with this step. Accurate cuts make the rest of the build much easier.
Step 2: Sand All Pieces
Sanding is a step many beginners skip. Do not make that mistake. Sanding creates a smooth surface and helps your finish look professional.
Start with 120-grit sandpaper. This removes rough spots and saw marks. Then switch to 220-grit for a finer finish. Sand with the grain of the wood, not against it.
Wipe away all dust with a tack cloth before moving to the next step.
Step 3: Assemble the Leg Frame
Now it is time to put things together. Apply wood glue to the joints where the legs meet the stretchers. Then drill pilot holes and drive screws through.
Use clamps to hold everything steady while the glue dries. Make sure your legs are perfectly straight. A crooked frame will cause problems later.
Let the glue set for at least 30 minutes before moving on.
Step 4: Attach the Seat Board
Place the seat board on top of the leg frame. Make sure it is centered and even on all sides. Pre-drill holes through the seat board into the top of the legs.
Drive screws through the seat board into the legs. Use screws that are long enough to grab the leg wood but not so long that they poke through the top.
Check for wobble by pressing down on each corner. If it wobbles, check your screws and make small adjustments.
Step 5: Add Finishing Touches
Fill any screw holes or gaps with wood filler. Let it dry completely. Then sand the filled spots smooth.
Now apply your finish. You can use wood stain for a natural look or paint for a pop of color. Apply thin, even coats. Let each coat dry fully before adding the next.
Finish with two to three coats of polyurethane. This protects the wood from spills, scratches, and daily wear.
Step 6: Place and Enjoy
Move your finished kitchen bench into position. You did it! Take a moment to admire your work. Then invite someone to sit down and enjoy a meal together.
If you love cooking breakfast at your new bench, try making Egg In A Bagel Hole for a fun and easy morning meal. There is something special about cooking and eating at a bench you built yourself.
Common Mistakes to Avoid
Skipping the Pilot Holes
Always drill pilot holes before driving screws. Without them, the wood can split. This is especially true for pine and other soft woods. Pilot holes also help you drive screws straight.
Using the Wrong Wood Glue
Not all wood glues are the same. Use a glue specifically designed for woodworking. It creates a stronger bond than regular white glue. Look for products labeled as carpenter’s glue or wood glue.
Ignoring Wood Movement
Wood expands and contracts with changes in humidity. If you build your bench too rigidly, it can crack over time. Allow for some natural movement in your design. This is especially important for the seat board.
Rushing the Sanding Process
Skipping sanding or rushing through it leads to a rough finish. Take your time with each grit level. The difference in the final result is huge.
Forgetting to Seal the Wood
Kitchen benches get exposed to water, grease, and food acids. Without a proper sealant, the wood can stain and swell. Always apply a food-safe finish if your bench will be used for food preparation.
Expert Tips for a Perfect Kitchen Bench
Here are some pro tips that make a real difference:
- Pre-drill everything. It saves wood and prevents splits.
- Use clamps liberally. They hold pieces in place while glue dries.
- Test your finish on scrap wood first. This lets you see the color before committing.
- Add felt pads under the legs. They protect your floor from scratches.
- Consider a slight bevel on the seat edges. It feels more comfortable and looks polished.
- Build your bench in the garage or workshop. A flat, stable surface makes assembly much easier.
If you want to explore more kitchen ideas, check out this guide on Egg In A Bagel Hole for creative breakfast recipes you can enjoy at your new bench. Another great resource is learning about Egg In A Bagel Hole techniques for your morning routine at the kitchen bench.
How to Maintain Your Kitchen Bench
A well-built bench lasts for years with proper care. Here is how to keep it looking great:
- Wipe up spills right away. Water can damage wood over time.
- Use a soft cloth and mild soap for cleaning.
- Reapply polyurethane every 6 to 12 months.
- Avoid placing hot pots directly on the surface.
- Use coasters and placemats to protect the finish.
- Tighten screws once a year to keep the bench stable.
These simple habits keep your kitchen bench looking fresh and feeling solid for many years.
Conclusion
Building a kitchen bench is one of the most rewarding DIY projects you can do. It is practical. It is affordable. And it is something you can be proud of every time you walk into your kitchen.
With these easy step by step plans, you have everything you need to get started. Gather your materials. Set up your workspace. Follow each step carefully. In no time, you will have a beautiful and functional kitchen bench that your whole family will enjoy.
Start your project this weekend. You will be glad you did. Your kitchen is ready for a custom bench that is truly yours.
Frequently Asked Questions
How hard is it to build a kitchen bench for beginners?
It is quite easy. A basic kitchen bench requires only a few cuts and simple assembly. If you can use a saw and a drill, you can build one. Start with pine wood if you are new to woodworking.
How long does it take to build a kitchen bench?
Most people finish a simple kitchen bench in one full weekend. That is about 6 to 8 hours of work spread across Saturday and Sunday. The drying time for glue and finish adds a little extra.
What is the best wood for a kitchen bench?
Pine is the best choice for beginners because it is affordable and easy to work with. Oak and maple are excellent for durability. Choose based on your budget and how much wear the bench will see daily.
Do I need advanced woodworking tools to build a kitchen bench?
No. You only need basic tools like a circular saw, a drill, sandpaper, and a measuring tape. You do not need a table saw or expensive equipment. A simple setup works perfectly for this project.
Can I build a kitchen bench without any woodworking experience?
Absolutely. These plans are designed for beginners. Take your time, measure carefully, and follow each step. Watch a few tutorial videos if you want extra guidance. You will be surprised how quickly you learn.
How do I make my kitchen bench look professional?
Sanding is the biggest secret. Take time with each grit level. Apply even coats of stain and finish. Use wood filler to hide screw holes. These small details make a big difference in the final look.